In this post, I will discuss how to setup PacketFence to work with Microsoft Active Directory.
First thing we need to do is log in to the PacketFence server, then click on "Configuration" at the top, then "Roles" on the left. When users are authenticated, they will need to be placed into a role. With that said, it is easier to create the role first. It saves a lot time going back and forth between the two screens.
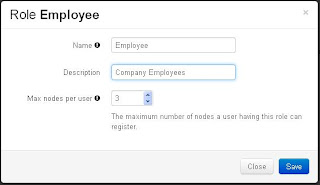
On the "Roles" page, click on "Add Role" at the bottom. A window will appear in the screen.
Now, it is time for the good part. Click on the "Sources" button on the left. At the bottom, click "Add Source" then "AD".
A "New Source" page will appear.
Every setting on this page will need to be filled in.
- Name: Give the source a name. I just named it the same as my domain controller
- Description: Give a brief description. "Company Employees" is my description
- Host: This is the IP address of your Domain Controller. Enter "389" for the second box. (389 is the default port that AD and LDAP use) and select none for the last box.
- Base DN: Enter the full path to your user accounts. Here is mine: "ou=Teachers,dc=School,dc=District,dc=k12,dc=State,dc=us".
- Helpful Tip: OU stands for Orginization Unit, DC stands for Domain Controller, CN stands for Common Name
- Scope: Select the type of scope you want. I selected "Subtree" because I have additional OUs in my Teacher OU
- Username Attribute: This is the name of the field that PacketFence will use to authencate users with. If you want to use the AD username, type in "sAMAccountName".
- Bind DN: Here you want to enter the full AD path of a user with domain admin rights. I used the administrator account: cn=administrator,ou=Domain Admins,ou=School,dc=District,dc=k12,dc=State,dc=us"
- Password: Enter the password for the account that you used with Bind DN.
Now, click on "Test". If you entered everything correctly, you will see a green bar across that says "Success". If not, double check everything you typed in. If you have nested OUs, you have to start with the deepest one and work backwards. So if your OUs are Company -> Department -> Sales, your Base DN and Bind DN should look like "ou=Sales,ou=Department,ou=Company,dc=Company,dc=com".
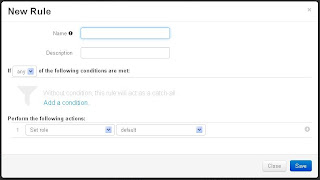
Once you have Success, click on "Add Rule". A window will appear.
Give the Rule a name. I entered "Employees".
If you would like to, give a brief description like "Rule for all Employees".
Under "Perform the following actions", select "Set Role" and then select the role you created early (Employee).
To the right of the role you selected, click on the plus (+) sign. Select "Set Unregistration Date" and select a date. I choose Jan.1st, 2020 for testing purposes.
Remember to save everything.
And that is it. Your users can now use their Active Directory username and password to register nodes (devices) with PacketFence.


Thank you very much for the information. Alone with his paper can correct a configuration error that was because the information in official documents is very poor.
ReplyDelete